

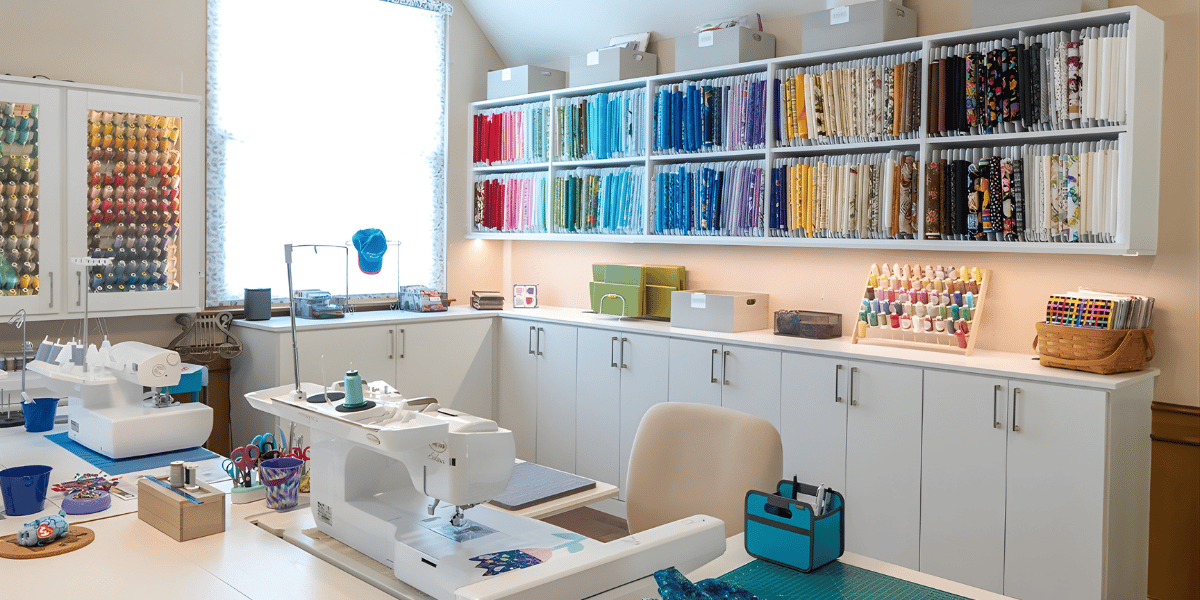
A well-organized craft room has completely changed the way I approach creative projects. Instead of digging through overflowing drawers or searching for misplaced tools, I can sit down, gather what I need within minutes, and focus entirely on making something special. Organization has never limited my creativity. In fact, it has given me more freedom to experiment because I know exactly where my supplies are and how much I have available.
No matter the size of the workspace, a thoughtful organization system makes crafting more enjoyable and productive. Whether I have an entire room dedicated to my hobbies or just a small corner of the house, keeping everything neat allows me to spend more time creating and less time cleaning up. Must-Have Craft Room Organization Ideas can help transform any workspace into an efficient and inspiring environment where every project begins with confidence.
Divide Supplies Into Categories
One of the first improvements I made was grouping similar supplies together. Instead of storing everything wherever it fit, I created dedicated sections for paper, paints, adhesives, fabric, ribbons, vinyl, beads, brushes, cutting tools, and unfinished projects. This simple change immediately reduced the amount of time I spent searching for materials.
Categorizing supplies also makes inventory much easier. I can quickly see when I am running low on glue, cardstock, or paint without opening multiple containers. It also prevents duplicate purchases because I always know what I already have.
As my craft collection continues to grow, maintaining these categories keeps the workspace from becoming cluttered again. Returning items to their designated locations has become a habit that saves time every time I start a new project.
Use Clear Storage Containers
Clear storage containers remain one of the most valuable organization tools in my craft room. Being able to see the contents without opening every box helps me work much more efficiently. Whether I am storing embellishments, vinyl scraps, buttons, or paint bottles, transparent containers eliminate unnecessary guesswork.
I prefer stackable containers with secure lids because they protect supplies from dust while maximizing storage space. They also make it easier to organize shelves without creating unstable piles of materials.
Adding simple labels to each container provides another layer of organization. Even when I can see the contents, clearly marked containers allow me to find supplies almost instantly.
Install Wall Storage
Vertical space is often overlooked, but it has become one of the most useful parts of my craft room. Pegboards, floating shelves, hanging baskets, and wall-mounted organizers keep frequently used tools visible while freeing up valuable desk space.
I use pegboards to store scissors, rulers, measuring tapes, cutting mats, and other hand tools that I reach for regularly. Hooks and small shelves can easily be rearranged as my collection changes over time.
Using the walls instead of filling every tabletop creates a cleaner, more open workspace that feels easier to work in.
Organize Drawers With Dividers
Drawers can quickly become cluttered if everything is tossed inside together. Drawer dividers have helped me separate markers, pencils, paint brushes, craft knives, adhesives, stamps, and other small supplies into clearly defined sections.
Instead of digging through tangled materials, I can open a drawer and immediately locate the exact item I need. This saves time while protecting delicate tools from unnecessary damage.
Keeping similar items together also encourages me to return them to the proper place after each crafting session.
Create a Dedicated Wrapping Station
Since I frequently make handmade gifts, I decided to create a small gift-wrapping area within my craft room. Ribbons, gift tags, tissue paper, wrapping paper, bows, tape, scissors, and decorative embellishments all have their own storage space.
Having everything organized in one location allows me to package finished gifts immediately rather than searching through different cabinets throughout the house. It also helps me coordinate colors and decorative elements more easily.
This dedicated station has made gift presentation just as enjoyable as making the gift itself.
Store Paper Vertically
Paper is one of the easiest supplies to damage if it is stacked carelessly. I organize cardstock, scrapbook paper, printable vinyl, and specialty papers vertically using magazine holders and document organizers.
Vertical storage allows me to flip through colors and patterns quickly without disturbing the rest of the collection. It also reduces bent corners and wrinkles that often develop when paper is stacked under heavy materials.
Sorting paper by color or theme makes selecting materials much more enjoyable during creative projects.
Use Rolling Carts for Everyday Supplies
A rolling storage cart has become one of the most flexible pieces of furniture in my craft room. I keep my most frequently used supplies on its shelves, allowing me to move everything wherever I happen to be working.
Paints, adhesives, brushes, scissors, cutting tools, and current project materials all stay organized while remaining within easy reach. Once I finish crafting, I simply roll the cart back into its storage space.
The mobility of the cart also makes it easy to share supplies when crafting with family or friends.
Keep Ongoing Projects Separate
One habit that has greatly improved my organization is giving every unfinished project its own storage bin. Instead of mixing supplies from different crafts together, I place all materials for each project into individual containers until they are completed.
This system allows me to pause a project without forgetting where I left off. Instructions, embellishments, tools, and partially completed pieces all remain together, ready for the next crafting session.
Separate project bins also prevent unfinished work from cluttering the main workspace, making it easier to begin something new without creating confusion.
Label Everything Clearly
Labels have become one of the simplest yet most effective organization tools I use. Every shelf, drawer, storage bin, and folder in my craft room has a clearly marked purpose. Even if I already know where everything belongs, labels help maintain consistency over time.
When supplies have designated homes, cleanup becomes much faster because I never have to decide where something should go. Anyone helping organize the craft room can also return items correctly without asking questions.
Clear labels create an organized system that remains effective even as my collection continues growing.
Build a Comfortable and Functional Workspace
Organization is about more than storage alone. I have found that the layout of my workspace plays a major role in how enjoyable and productive each crafting session becomes. Keeping my worktable clear, positioning frequently used tools within easy reach, and ensuring there is enough room to spread out larger projects all contribute to a smoother creative process.
Comfortable seating is another worthwhile investment. Since some projects require several hours of detailed work, a supportive chair helps reduce fatigue and allows me to stay focused longer. I also make sure my workspace has bright lighting so I can clearly see fine details when painting, cutting, or assembling intricate handmade gifts.
A functional workspace encourages better habits because everything is arranged with purpose. Instead of constantly moving supplies around to make room, I can concentrate fully on creating high-quality projects from start to finish.
Schedule Regular Decluttering Sessions
Even the best organization system requires occasional maintenance. Every few weeks, I spend a little time sorting through my supplies, throwing away unusable scraps, cleaning tools, and reorganizing anything that has drifted out of place. These short sessions prevent clutter from building into an overwhelming task.
I also take the opportunity to evaluate which materials I use most often and which ones have been sitting untouched for months. This helps me make smarter purchasing decisions while creating additional storage space for supplies I genuinely need.
Regular decluttering keeps my craft room inspiring rather than stressful. A clean and organized environment motivates me to begin new projects because I know everything I need is ready and waiting.
Final Thoughts
A thoughtfully organized craft room makes every creative project more enjoyable, efficient, and rewarding. Simple improvements such as categorizing supplies, using clear containers, organizing paper vertically, and maintaining dedicated project bins can dramatically improve both workflow and creativity. Organization is not about perfection—it is about creating a space that supports inspiration.
Must-Have Craft Room Organization Ideas have helped me transform my workspace into a place where creativity thrives without unnecessary clutter or frustration. Whether working in a large studio or a small crafting corner, these practical solutions make it easier to stay organized, protect valuable supplies, and enjoy every step of the handmade gift-making process. With an efficient workspace, I can focus on what matters most: turning creative ideas into meaningful handmade creations.
