

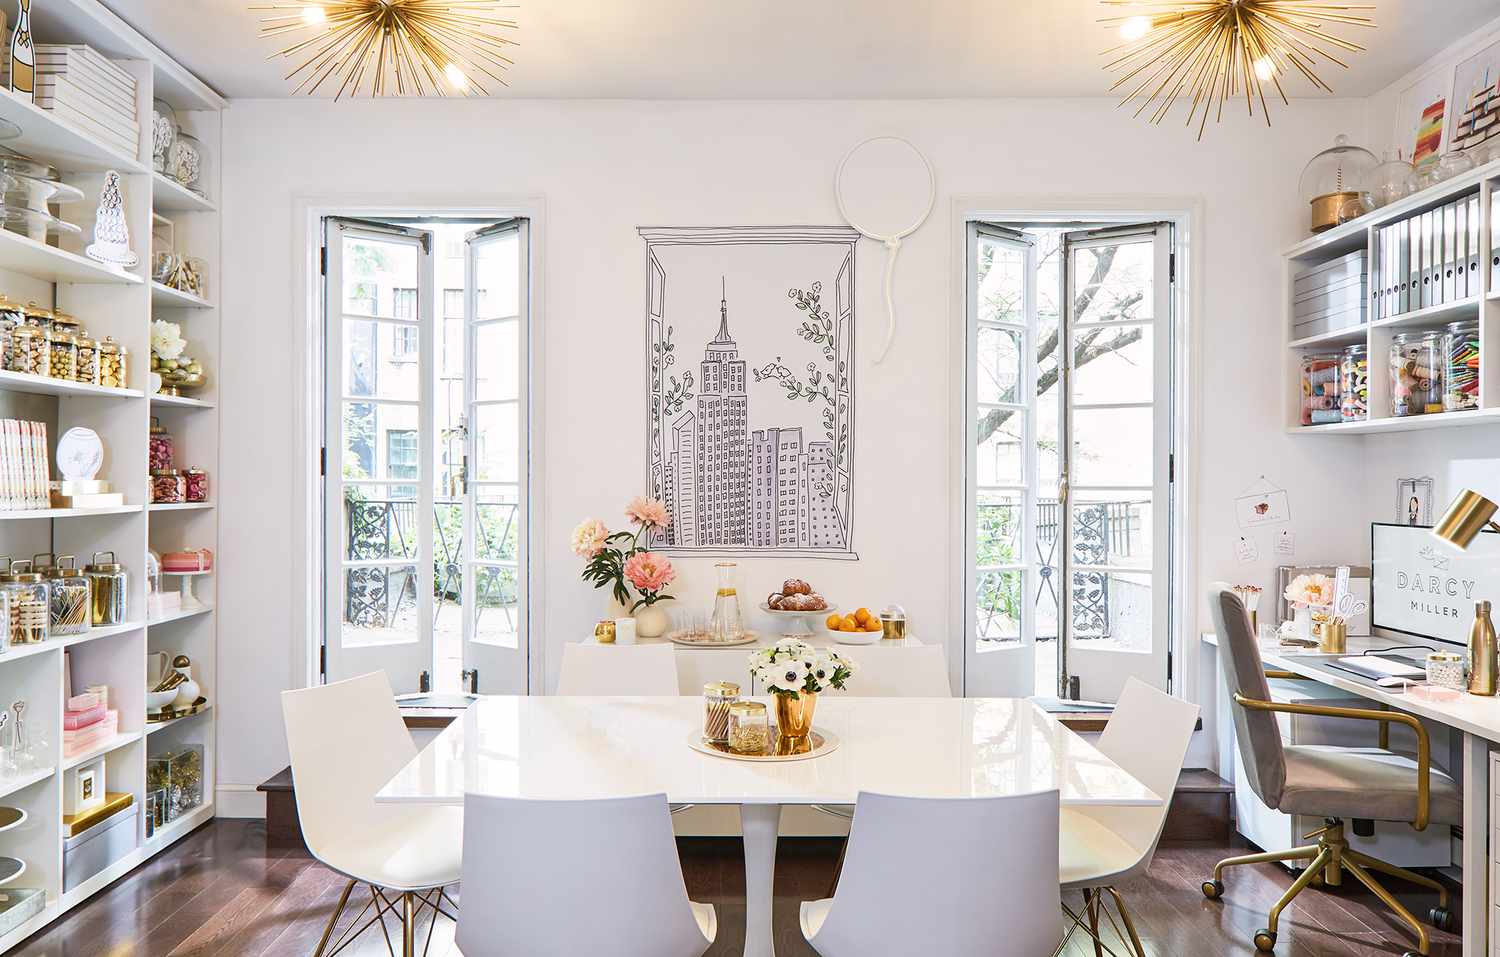
A well-organized craft room can completely change the way I approach creative projects. Instead of spending valuable time searching for scissors, paint, ribbon, or glue, I can focus entirely on bringing new ideas to life. Over the years, I have learned that organization is not just about keeping a tidy workspace—it is one of the easiest ways to become more productive while making crafting far more enjoyable.
Even a small crafting area can function like a professional studio with the right storage systems and daily habits. Whether I am making handmade gifts, home décor, personalized keepsakes, or seasonal decorations, having everything organized allows me to work more efficiently from start to finish. Craft Room Organization Tips That Save Time are designed to reduce clutter, simplify project planning, and ensure that every tool and supply is exactly where it should be whenever inspiration strikes.
Give Every Item a Permanent Home
The biggest improvement I ever made was assigning every craft supply a permanent storage location. Instead of placing materials wherever there happened to be space, I organized them into categories such as paints, adhesives, fabrics, vinyl, ribbons, paper, brushes, and cutting tools.
Knowing exactly where everything belongs eliminates wasted time searching for supplies and makes cleanup much easier after every project.
Consistency is far more important than having expensive storage furniture. Even simple shelves and inexpensive storage bins become highly effective once every item has a designated location. After finishing a project, I immediately return each tool to its proper place so my workspace is always ready for the next creative session.
Store Supplies by Category
Grouping similar materials together creates a more efficient workspace. I keep all painting supplies in one area, sewing tools in another, and paper crafting materials in separate labeled containers.
This system allows me to gather everything needed for a project in just a few minutes. It also prevents duplicate purchases because I can easily see what I already own.
Categorized storage makes every crafting session more efficient. It also helps me discover forgotten materials that might inspire new ideas rather than buying supplies I already have hidden somewhere in the room.
Label Every Container
Clear labels save an incredible amount of time. Whether I use printed labels, handwritten tags, or simple stickers, every storage bin clearly identifies its contents.
Transparent containers combined with labels work especially well because I can quickly confirm what is inside without opening multiple boxes.
As my collection grows, labels become even more valuable. They also make it easier for family members to help organize the room without constantly asking where each item belongs.
Take Advantage of Vertical Space
When table space becomes limited, I look upward instead of outward. Pegboards, floating shelves, wall-mounted baskets, magnetic strips, and hanging organizers help keep frequently used tools within easy reach.
Using vertical storage also keeps work surfaces clear, making it easier to spread out projects without unnecessary clutter.
Walls often provide more storage opportunities than we realize. Adding a few shelves above the worktable creates space for paints, baskets, storage jars, and decorative containers while keeping valuable workspace free for crafting.
Keep Frequently Used Tools Nearby
The supplies I use every day deserve the most accessible locations. My scissors, rulers, craft knife, measuring tape, glue, cutting mat, pens, and favorite paintbrushes stay within arm’s reach of my main workspace.
Less frequently used equipment can be stored in cabinets or higher shelves without affecting productivity.
Easy access saves countless small interruptions throughout the day. Instead of constantly standing up to retrieve tools, I remain focused on the creative process and complete projects much more efficiently.
Organize Small Items in Divided Containers
Buttons, beads, sequins, screws, charms, eyelets, and other tiny supplies can quickly become difficult to manage if stored loosely.
I use divided organizers, stackable drawers, or small compartment boxes to separate these materials by size, color, or purpose. This keeps everything visible while preventing small pieces from becoming mixed together.
Organized small supplies also make inventory much easier. Rather than buying another package of buttons or beads, I can immediately see exactly what is already available.
Maintain a Scrap Storage System
Instead of throwing away leftover wood, fabric, vinyl, ribbon, or paper, I organize usable scraps into clearly labeled containers. Small offcuts often become perfect for gift tags, embellishments, sample pieces, or future projects.
Sorting scraps by material or color allows me to find useful pieces quickly instead of digging through one large pile.
A well-maintained scrap collection reduces waste while encouraging creativity. Some of my favorite handmade gifts have been created almost entirely from leftover materials that would otherwise have gone unused.
Create a Project Planning Station
One area of my craft room is dedicated entirely to planning. I keep notebooks, measuring tools, sketch paper, project folders, color swatches, and inspiration photos together so I can organize ideas before beginning construction.
Having a dedicated planning space reduces confusion and helps me prepare materials before starting. It also keeps unfinished ideas organized until I have time to complete them.
Planning separately from crafting helps projects move much more smoothly. I also keep a calendar nearby for tracking birthdays, holidays, and upcoming events so I can begin handmade gifts well before deadlines.
Keep Cleaning Supplies Close
A clean workspace is easier to maintain when cleaning products are readily available. I always keep microfiber cloths, paper towels, gentle cleaners, trash bags, and a small handheld vacuum nearby.
Cleaning spills immediately prevents paint, glue, and resin from damaging work surfaces or tools. Regular cleanup also keeps supplies in better condition and makes it easier to begin the next project.
Small cleaning habits save significant time over the long term. Spending a few minutes cleaning after every crafting session prevents overwhelming messes from building up.
Rotate Seasonal Supplies
Holiday decorations, seasonal ribbon, specialty papers, and themed embellishments do not need to occupy valuable everyday storage space throughout the year.
I pack seasonal materials into labeled bins that can be easily retrieved when needed. This keeps frequently used supplies easily accessible while reducing clutter during the rest of the year.
Rotating inventory creates a more efficient workspace all year long. It also helps protect delicate seasonal decorations from unnecessary handling while they are not in use.
Create a Charging and Technology Area
Modern crafting often involves electronic tools such as cutting machines, heat guns, label makers, rechargeable glue guns, tablets, and laptops. I created a small charging station where these devices remain plugged in and ready whenever I need them.
Keeping charging cables organized with clips or cable sleeves prevents tangled cords from cluttering the workspace. It also reduces the chance of accidentally unplugging important equipment during a project.
Having dedicated storage for technology keeps the work area safer while making electronic tools much easier to access.
Store Works in Progress Separately
One habit that has saved me countless hours is creating a dedicated area for unfinished projects. Instead of leaving partially completed crafts scattered across my worktable, I place them inside labeled project bins or trays.
Each container holds the unfinished item along with its instructions, materials, and tools so I can immediately continue where I left off. This prevents projects from becoming mixed together and eliminates the frustration of forgetting what still needs to be completed.
Keeping unfinished work organized also makes the craft room feel much less cluttered.
Use Clear Inventory Tracking
As my collection of supplies grew, I realized I occasionally purchased materials I already owned simply because I had forgotten about them. To solve this, I created a simple inventory notebook listing frequently used supplies such as paint colors, vinyl sheets, cardstock, adhesives, ribbon, and specialty tools.
Reviewing this list before shopping helps me avoid unnecessary purchases while reminding me of supplies I have not used recently.
Even a basic inventory system can save money while making project planning much faster.
Review and Declutter Regularly
Every few months, I take time to evaluate my craft room. Broken tools, dried-out adhesives, duplicate materials, and supplies I no longer use are either discarded, donated, or reorganized.
Regular decluttering prevents the workspace from becoming overcrowded and makes it easier to find what I truly need. It also reminds me of materials I already own before buying more.
An organized craft room is not something that happens once—it is maintained through small, consistent habits. Spending just a few minutes each week putting supplies back where they belong helps prevent clutter from gradually returning.
Final Thoughts
An organized craft room allows creativity to flourish without unnecessary distractions. By assigning permanent storage locations, labeling containers, maximizing vertical space, organizing unfinished projects, and maintaining simple daily routines, crafting becomes faster, less stressful, and much more enjoyable.
Craft Room Organization Tips That Save Time demonstrate that effective organization does not require a large studio or expensive storage systems. With thoughtful planning, practical storage solutions, and consistent habits, any creative space can become an efficient, inspiring environment where ideas come to life and every project starts with confidence. The more organized my craft room becomes, the more time I can spend doing what I enjoy most—creating thoughtful handmade gifts that reflect both creativity and care.
